

The original plan was to finish it with beadboard and some molding. After some thought, I realized that this would definitely require some straight cutting and intricate painting. I also wasn't sure if that was the look I wanted for the kitchen. In hind sight.... I should have went with the beadboard.
So I started looking for plan b. I had this 3" area with a gap in the cabinets that I had to cover. I found a pin on Pinterest that showed "easy" board and batten molding update and the light went off.

I wouldn't really have to worry about cutting straight, I could buy planks of wood and be golden. I started onward with my plan and created a drawing. At most home improvement stores, they will cut down wood, so I needed my measurements to be correct. After all, it's not like I could do much sawing at home (except by hand).
Misadventure #1 Measure Twice, Cut Once. But Really, Measure 15 Times, Cut Twice.
After I had made my plan, remade my plan and made the 3rd time the charm, I thought I was ready. Then I learned a startling fact: 1 x 4's are really 3/4" by 3 1/2". 1" x 4" is a 'nominal dimension'. Nominal, I think not. So I changed alllll the dimensions on my drawing again.
Another related issue was figuring out spacing that would cover the gap in cabinets but not be wonky. I divided the section into 3 sections that seemed to work. I finalized all the measurements and created my cut list for my trip to the store.
The gentleman that helped me was very nice and didn't groan when I said I needed 8 - 38 1/8" pieces. I had my top and bottom pieces for the 3 unfinished sides and the vertical boards.
Misadventure #2 I Did Not Nail It.
Now it was time to attach the trim boards. Most trim is held in with nails. I know this. So I got nails as the store. Two different lengths, actually. I started with the bottom board along the back side, which should have been the easiest.
So I put a nail in the center and started it in the board. I'm surprisingly good at hammering nails without hurting myself (but walking is another story). I noticed when I got the first nail all the way in, the board wasn't tight up against the cabinet back. Hmmmm, interesting. My mind said 'Keeping going! MORE NAILS!' So I start on the 2nd nail above the 1st. The board gets farther away from the cabinet back, almost like I'm nailing it backwards.
I'll spare you the next 20 minutes of banging with the hammer, putting numerous nail holes in the board and the cussing. What was happening? The hammering was actually vibrating the cabinets, which was vibrating the nails out of the cabinets. Another evening trip to the store and I had screws. I wasn't lucky enough to be able to use trim screws because they were too long as it would have been easier to fill the holes later.
Misadventure #3 See Misadventure #1, Repeat.
Once I got the bottom boards in place, I started to place the vertical boards along the back. I had measurements and a drawing, I should be set.
I was not set. While putting the 2nd vertical boards in place, I realized it wasn't going to cover the gap with my current measurements. How did this happen? I still don't know. I went back to the plans and recalculated the gap between boards. I got all 4 vertical boards up along the back, stepped back and realized.... the spacing wasn't even. How did this happen? At this point, I'm pretty sure I'm an idiot.
I went back to the plans again and decided to make a radical decision that I'm sure no one will ever notice: The spacing along the back of the island isn't even in all 3 panels, but it's symmetrical. I took the boards back off and started again.
Misadventure #4 See Misadventure #1, #3.
This problem cropped up when I started fitting in the vertical boards. I had measured the island, calculated everything (though apparently not well) and the vertical boards should fit perfectly. If not, I should have room to manuever them around.
I did not have that room. Apparently when you shrink down a woodworking project, things get harder and more precise. A 1/16" longer board required lots of sanding, attempts with the hand saw to only cut it down by 1/16". I'll also spare you the hours spent on this portion and the cussing. I was ready to give up here. Precise measurements would have been a lifesaver.
Now to the part with pictures!
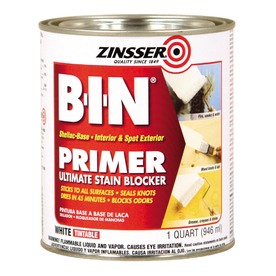
I primed all of the boards before putting them in place to save hassle later. That was a good idea. Definitely prime the boards first. This stuff worked great and covered like a charm, but smelled horrible.
I planned to paint it white, but first things first, I needed to fill the nail holes and gaps between boards.
Misadventure #5 There Is A Time And A Place For Caulk.
I bought Adhesive Caulk thinking that I could kill 2 birds with 1 stone and I even made sure to get a paintable version.

I got the necessary tools and went to town! I squeezed caulk into all the screw holes and scraped off the excess. I noticed it was shrinking into the hole, but figured I'd have to apply more than once. I did the same thing between boards and scraped off any excess.

Then I realized that the caulk shrank quite a bit. So I put on a larger amount above the screw holes, thinking I could just sand down the excess.


Filling screw holes with wood filler is MUCH easier. Get some on the corner of the putty knife.

Press it directly into the hole.

Scrape over it to get off the excess.

Reapply until you have enough in the hole and it's smooth enough to need need a ton of sanding.

Repeat.

Wood filler dried so much better. It didn't shrink and was easily sanded. I sanded between coats to see my progress using 180 grit sand paper blocks and it worked really well.
I ended up doing 2 applications of wood filler with sanding and then it was time to paint! I'm happy to say that the rest of this was smooth sailing. Except almost not having enough paint, but I didn't run out.
I cut in the corners with a 1 1/2" brush first and then rolled the boards and insets with a small roller. I made the first coat thing so it would dry quickly and I could get a 2nd coat on within an hour. Can you tell I was getting impatient by this point?

It looked pretty good after the first coat, but I could still see some dark filled spots, so another thing coat it was.
Without further ado, the finished DIY kitchen island!


It's not perfect, but for my first major DIY project and woodworking adventure, it turned out great. So great, that I've already started to ruin the counter top.
If you can put together furniture, have a good handle on using a tape measure and calculator, then this project is well within reach of any beginner DIYer. That is, as long as you learn from my misadventures.

No comments:
Post a Comment